

A candle tunnels when the flame only melts a narrow well around the wick and leaves a thick wall of untouched wax around the edge. There are usually two culprits at once: a wick that is too small for the diameter and a first burn that was too short. A shallow tunnel can be fixed with aluminium foil; to stop it happening again, use the right wick size and give the first burn 1 hour per 2.5 cm (1 inch) of diameter.
In 30 seconds
- A tunnel is wax that never melted. The lower the wick sinks, the harder it is for the flame to reach the edge.
- Causes: undersized wick, short first burn, hard or dense wax, too much fragrance or dye, and drafts.
- Rescue: foil around the rim, a heat gun, or scraping out the excess wax.
- Prevention: first burn of 1 hour per 2.5 cm of diameter (4 hours maximum) and a wick chosen by inner diameter.
- If you make the candle yourself, tunneling is a warning: test the next wick size up.
For this guide, start with candle wicks that fit the final application, then validate the complete formula in a small test before scaling.
What candle tunneling is (and why wax has a “memory”)
When you light a candle, the flame melts a circle of wax: the melt pool. When you blow it out, that pool sets and leaves a mark. Next time, the wax that has already melted once liquefies again before the untouched wax at the edge. Candle makers call this wax memory: the candle tends to repeat the diameter of its first melt pool.
If the first burn never reached the edge, every burn goes a little further down the same hole. The outer wall stays tall, the wick sinks, it gets less oxygen and the flame gets smaller. It is a vicious circle: the weaker the flame, the deeper the tunnel. Eventually the candle drowns with half a jar of unused wax, which is exactly what nobody who paid for it wants.
Why candles tunnel: the five causes
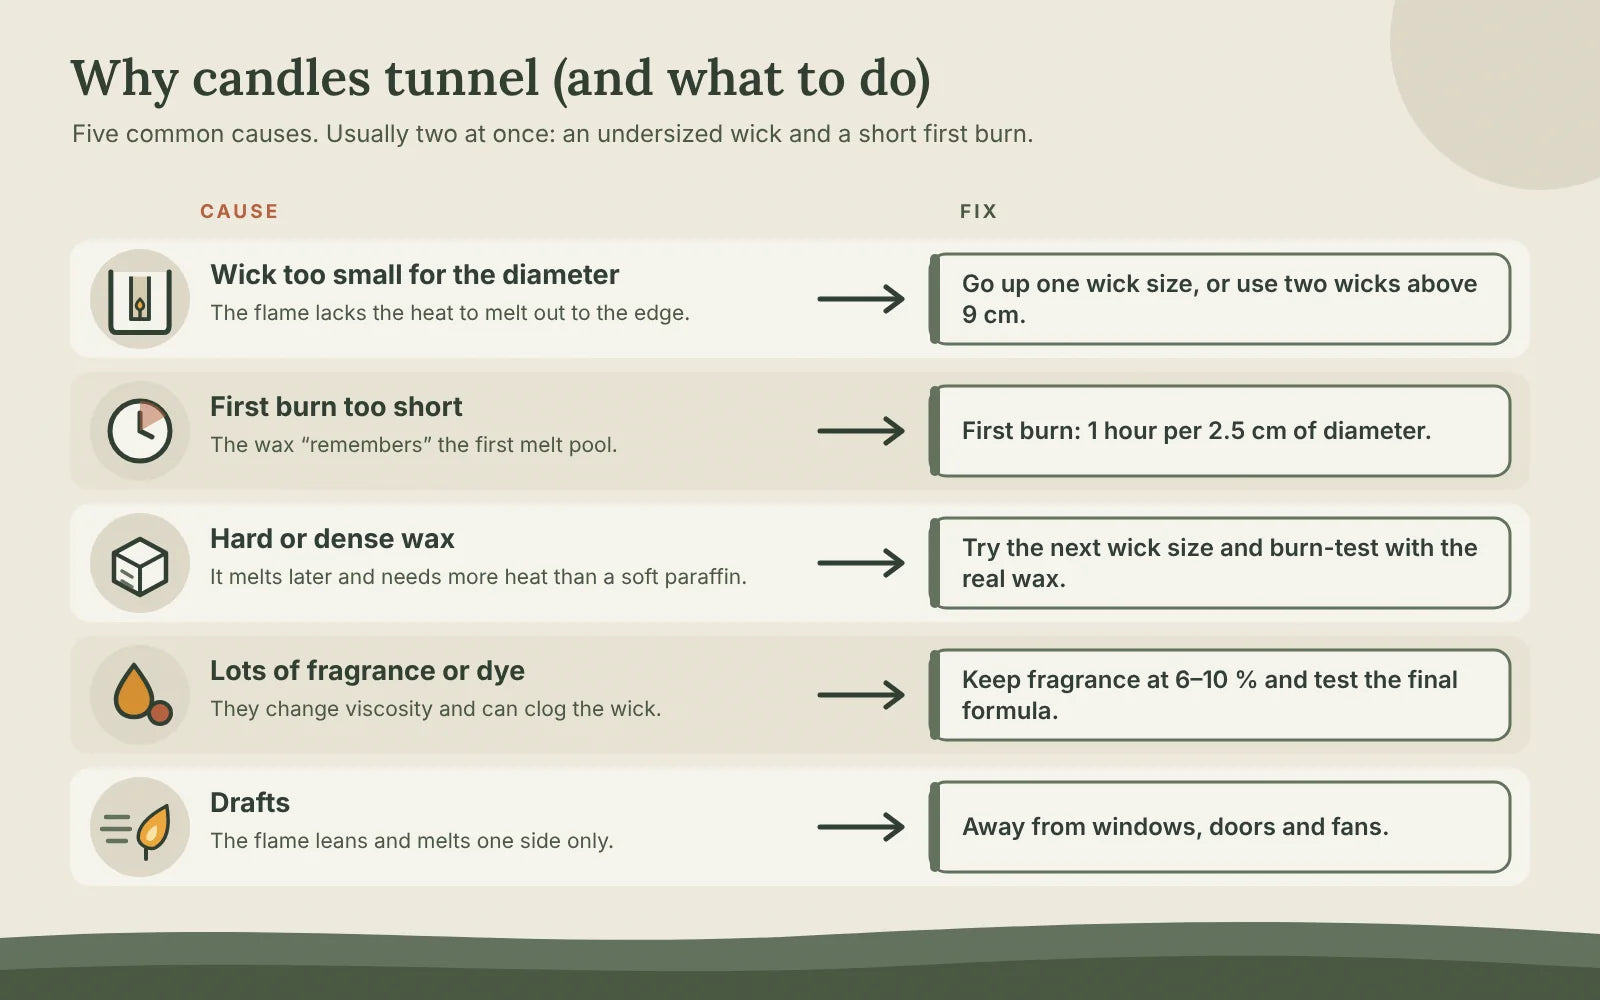
1. The wick is too small for the diameter
This is cause number one. Every wick produces a certain amount of heat, and that heat is enough to melt a circle of a certain size. If the jar is wider than that circle, the wax at the edge will never melt, however long you leave the candle burning. Wicks are chosen by the inner diameter of the jar, measured at its widest point.
2. The first burn was too short
The second cause, and the classic one with bought or gifted candles: lit for twenty minutes “to see how it smells” and then blown out. That small first pool sets the path. Even with the right wick, a candle can tunnel for this reason alone.
3. The wax is hard or dense
Waxes with a high melting point need more heat to melt out to the edge. Plant waxes such as soy are also thicker than paraffin once melted, so the wick has to work harder to draw them up. That is why soy wax often needs one wick size more than the same jar would need with a soft paraffin.
4. Too much fragrance or dye
Fragrance changes the viscosity of the wax and the way it burns. For our candle fragrances we recommend 6–10 % of the wax weight; at the top of that range the candle may need a different wick. Pigment-based dyes can also clog the wick and weaken the flame.
5. Drafts
An open window, a radiator or a fan pushes the flame to one side. That side melts and the other does not, so you get a lopsided tunnel or a wall of wax on one side only. Not the candle’s fault, but the result is the same.
How to fix a candle that is already tunneling
It depends on how deep the well is. Use a wooden skewer to measure the difference between the wax at the edge and the bottom of the tunnel.
| Tunnel depth | What to do |
|---|---|
| Less than 1 cm | One long burn until the pool reaches the edge is usually enough. If it doesn’t get there within a few hours, use foil. |
| 1–2 cm | Aluminium foil, or a heat gun to level the surface. |
| More than 2 cm | Scrape the excess wax from the edges with a spoon, level it with heat, then use foil on the next burn. |
| The wick is drowning | Remove wax until 5–6 mm of wick shows. If it is your own candle, remelt it and change the wick. |
The aluminium foil trick
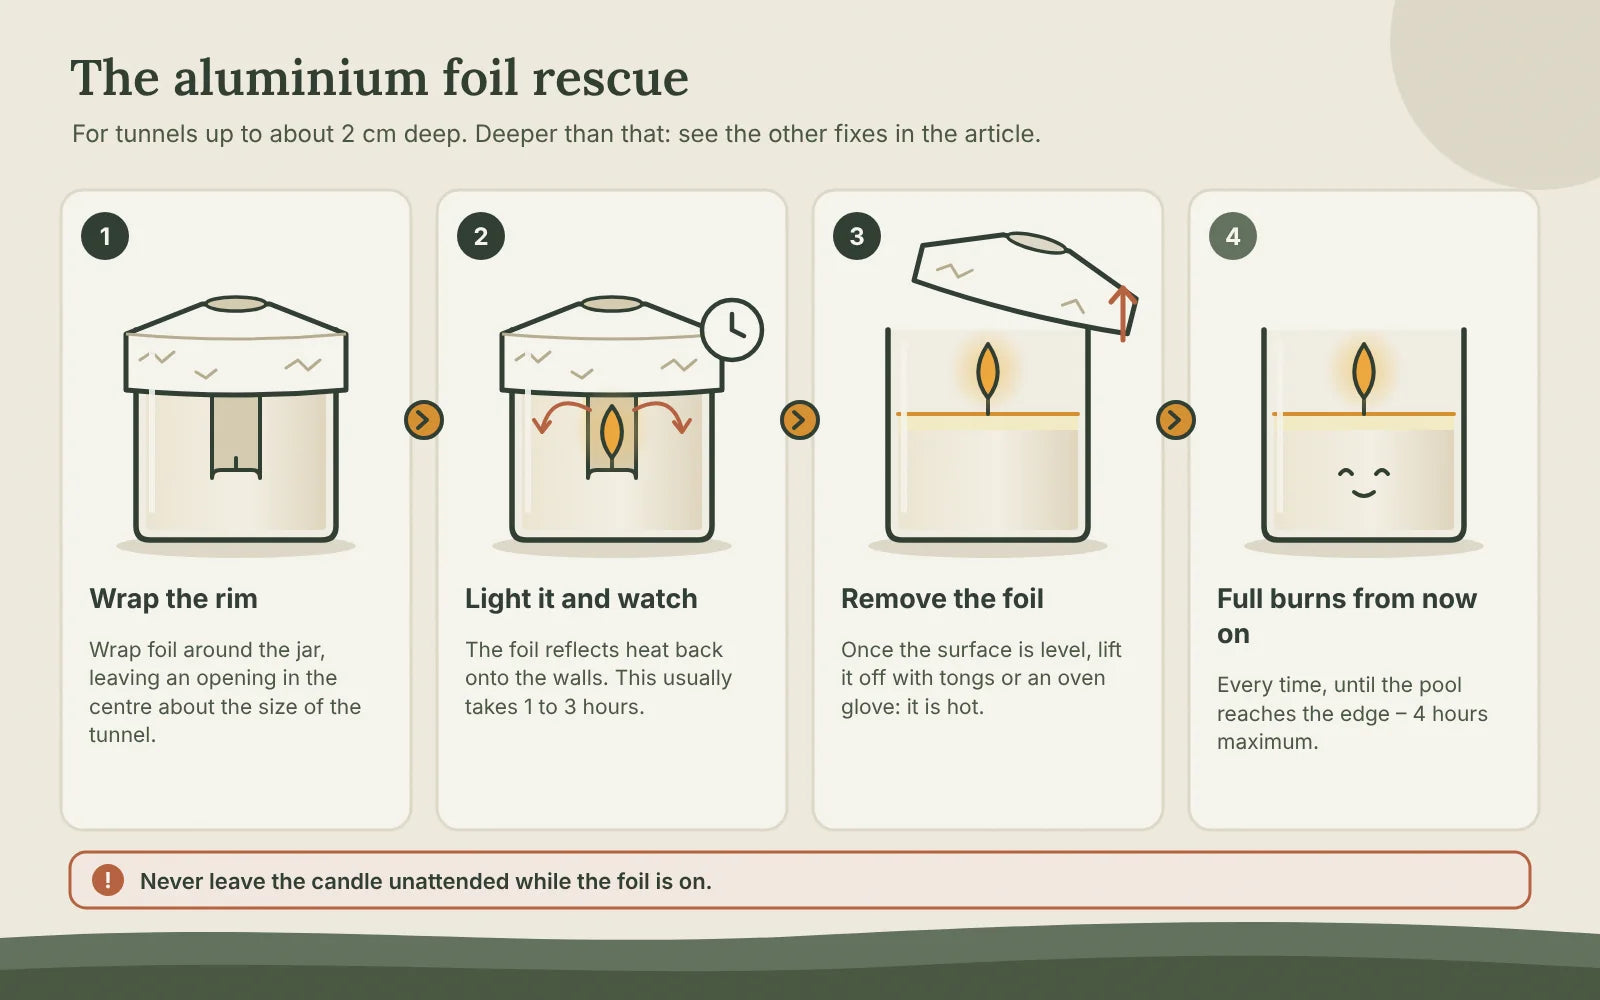
- Wrap the rim. Wrap aluminium foil around the top of the jar and fold it inwards over the wax, leaving an opening in the centre roughly the size of the tunnel. The flame needs air: do not close the opening.
- Light it and watch. The foil reflects heat towards the edges. It usually takes 1 to 3 hours, depending on the diameter and how deep the tunnel is.
- Remove the foil. Once the surface is level, lift it off with tongs or an oven glove: it is hot.
- Full burns from now on. Every time, until the pool reaches the edge, and never more than 4 hours in a row.
With a heat gun or hair dryer
With the candle out, direct hot air at the wax wall, working from the outside in, until the surface melts and levels. A craft heat gun is quick; a hair dryer on its hottest setting works too but takes longer and can blow wax around, so keep the fan speed low. Let the wax set again and then do a full burn.
Scraping out the excess wax
If the tunnel is deep, foil is not enough: the flame is simply too far down. With the candle cold, scrape the wax wall at the edges with a spoon until it is close to the level of the tunnel. That wax isn’t wasted: use it as wax melts in a burner. Then level the surface with heat and use foil on the next burn.
Never leave a candle wrapped in foil unattended or near anything flammable. Don’t try to pour liquid wax out of a lit candle, and never put a candle out with water. If the jar is very hot to the touch, extinguish it and let it cool.
How to prevent candle tunneling
First burn: 1 hour per 2.5 cm of diameter
This is the most useful rule and the one most often forgotten. The first time, keep the candle lit until the pool reaches the edge: as a guide, 1 hour per 2.5 cm (1 inch) of diameter. And never more than 4 hours in a row: beyond that the wick tends to mushroom and the jar gets too hot.
| Candle Ø | Approximate first burn |
|---|---|
| 5 cm | 2 hours |
| 6–7 cm | 2.5–3 hours |
| 7.5 cm | 3 hours |
| 9 cm | 3.5 hours |
| 10 cm or more | 4 hours maximum – from here on, two wicks work better |
If you sell candles, put this on the label or a care card. A lot of “my candle tunnels” reviews come down to a twenty-minute first burn.
The right wick for the diameter
Our wicks are sold by candle diameter, not by numbered series, in two lines: ECO (cellulose core, made in Spain) and cotton. All are pre-waxed, with a metal base and 15 cm long. The full explanation is in our technical guide to choosing candle wicks.
| Inner Ø | Naturcera wick | If it tunnels (soy or high fragrance) |
|---|---|---|
| 4–5 cm | ECO 4–5 cm or cotton 4–5 cm | Try 5–6 cm |
| 5–6 cm | ECO 5–6 cm or cotton 5–6 cm | Try 6–7 cm |
| 6–7 cm | ECO 6–7 cm or cotton 6–7 cm | Try 7–8 cm |
| 7–8 cm | ECO 7–8 cm or cotton 7–8 cm | Try 8–9 cm |
| 8–9 cm | ECO 8–9 cm or cotton 8–9 cm | Move to two wicks |
| Over 9 cm | Two or more wicks 5–6 cm apart, or a wooden wick | Go up one size per wick |
An off-centre wick also tunnels on one side. A wick centring bar keeps it straight while the wax cools.
Wax, fragrance and curing
Burn-test the final formula, with fragrance and dye in it. Respect the cure: paraffin is ready in a couple of days; soy and other plant waxes need one to two weeks for the burn to settle. And pour at the right temperature: soy wax poured too hot or too cold leaves an uneven surface (more on that in our guide on what temperature to melt soy wax).
A tunneling candle that has been sold is a return or a bad review. For each combination of wax, fragrance, dye and jar, pour three test candles (the table size, one down and one up) and note the melt pool diameter, its depth and the flame height at 1, 2 and 4 hours. If you change jar batch or fragrance supplier, test again. For regular supplies of wax and wicks, write to contacto@naturcera.com.
Candle wick size chart: which wick for which diameter? · How to Choose Candle Wicks (Technical Guide)
Frequently asked questions
Can you fix a candle that is already tunneling?
Yes, if the tunnel isn’t too deep. Wrap the rim with aluminium foil, leaving an opening in the centre, and let it burn until the surface is level. If the tunnel is deeper than about 2 cm, scrape out the excess wax at the edges first.
How long should you burn a candle the first time?
Until the melt pool reaches the edge: as a guide, 1 hour per 2.5 cm (1 inch) of diameter, but never more than 4 hours in a row.
Why does my soy candle tunnel even after burning for hours?
Because the wick is too small for that diameter. Soy wax is denser than paraffin and usually needs the next wick size up, especially with a high fragrance load.
Does a bigger wick always fix tunneling?
Not always. An oversized wick gives a tall flame, soot and mushrooming. Go up one size only and confirm it with a burn test. Above 9 cm, two wicks work better than one very thick one.
Can I use a hair dryer instead of a heat gun?
Yes, with the candle out and the fan on low so wax doesn’t splash. It takes longer than a heat gun but levels the surface just as well.
Materials for this project
For this guide, start with candle wicks that fit the final application, then validate the complete formula in a small test before scaling.
